How Can We Help?
How Install/Upgrade the DriveLock Agent
Automatically using the DriveLock Enterprise Server
The DriveLock Agent can perform automatic updates. This option is enabled by default in the following setting in the DriveLock policy:
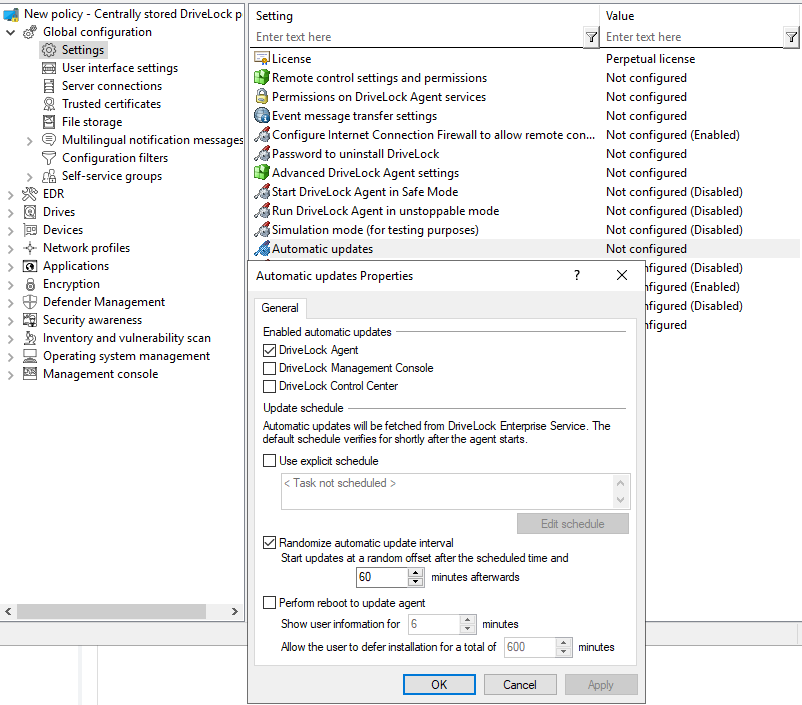
DriveLock Automatic Update
The agent checks the published software packages on the DES for a newer version (IF Published). If a newer version is available, it will be downloaded and installed.
To Publish the Agent version:
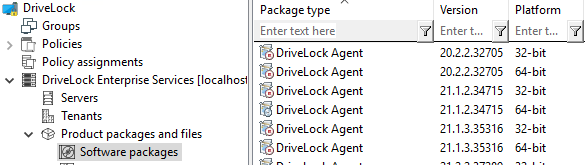
Open the DriveLock Management Console and navigate to ‘DriveLock Enterprise Services’ -> Product packages and files -> Software Packages.
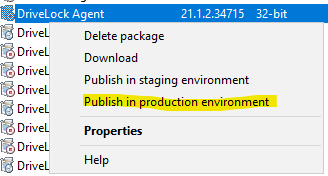
Right Click on the latest Package and Select “Publish in production environment”
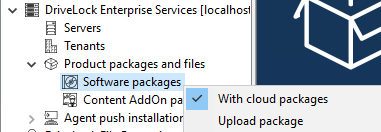
Note: If you are unable to see the available options, Please Right Click on “Software Packages” -> Select “With cloud packages”
Manually via msiexec and parameters
You can specify additional options when installing the agent via a command line or a script. Also, you can determine from where the agent gets its configuration settings and how they are accessed.
The following example shows an installation with custom parameters:
msiexec /I "DriveLock Agent X64.msi" /qb USESERVERCONFIG=1 CONFIGSERVER=https://YOUR-SERVER-FQDN:6067 TENANTNAME=rootAvailable options when configuring the DriveLock Agent via a centrally stored policy:
USESERVERCONFIG=1 | Indicates that a centrally stored policy is being used. |
CONFIGID=<GUID> | <GUID> is the GUID of the centrally stored policy in the form: XXXXXXXX-XXXX-XXXX-XXXXXXXXXXXXXX |
CONFIGSERVER=<name> | <name> is the server name on which the DriveLock Enterprise Service has been installed and from which the policy is to be loaded |
TENANTNAME=<tenant> | <tenant> is the tenant name the policy is to apply to. If you have not configured any tenants, please use “root” as tenant name. |
USEPROXY=1 | Indicates that a proxy is to be used |
PROXY=named;<proxy>:<port>PROXY=pac;<pac url>PROXY=netsh | <named>: use specific proxy<pac>: use Proxy Auto Configuration Script with URL<netsh>: use system proxy set with netsh |
PROXYACCOUNT=<authscheme>;<proxyuser>;<proxypassword> | Specify an account if the proxy requires authentication.<proxyuser>: User<proxypassword>: Password<authscheme>: possible values for the authentication scheme are basic, ntlm, passport, digest, negotiate. |
Note: You can gather the Agent MSI from the latest DriveLock ISO file or from the DriveLock Enterprise Server
Manually via msiexec and MST
Please do the following:
- Go to the Policies node in the DriveLock Management Console, open the All Tasks context menu and select Deploy centrally stored policy….
- Start the Agent Deployment Wizard. The wizard queries all required parameters and generates the corresponding output.
- In the second dialog, select the centrally stored policy you have created for use by DriveLock Agents and the server where the central DriveLock Enterprise Service is installed.
- In the next dialog, select the type of installation package you want the wizard to create:
- Microsoft Installer File (MSI): Creates a new Microsoft Installer package that contains the previously specified settings.
- Microsoft Installer Transform file (MST): Creates a Microsoft Installer Transform (MST) file with the selected settings. You can use a MST file together with the original MSI package that is included in the DriveLock installation.
- Command line: Displays the command line syntax with the selected settings for the Microsoft Installer.
- Specify the path and name of the original DriveLockAgent.msi file and the new MSI file.
- Start the agent deployment.
Agent Command Line Update
When the DriveLock Enterprise Server has a newer DriveLock Agent published to Production you can use the existing DriveLock agent and trigger an update.
drivelock -updateproduct